Below
are the steps in using the Trustee|Docs program. Once you are in the
Trustee|Docs
Application, you will
see a full screen of
frames and buttons like below, with different options.
| Click on one of the following items to learn how it works. | ||||
| Upload | Delete | Manage Directories | Bulk Uploads | Downloads |
UPLOADING SINGLE FILES
Uploading single files is a breeze with Trustee|Docs. Simply select the folder you wish to upload the documents to and click the upload button. Note, this option only supports quick, single file uploads and only allows .pdf extensions that do not exceed 20MB.
Below shows the upload menu.
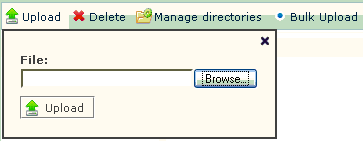
After you see the upload menu, you just simply click "Browse" and locate the file you wish to upload on your computer. Once that file is selected, you just click "Upload" and the .pdf file will be uploaded to the directory you specified, scanned and shipped off to its destination.
DELETING FILES
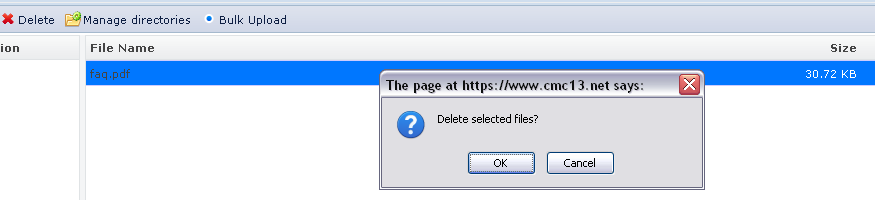
Deleting files you have uploaded can be deleted by clicking on the file and then clicking on the delete button in the menu bar. When you click on the delete button, you should see the image below. Clicking "OK" will delete the file from the document manager. You can also delete multiple items at the same time by holding the "Ctrl" key on your keyboard and selecting multiple files. Once you have selected the files you wish to delete, just click the "Delete" button again and the files will be deleted from the system.
MANAGING DIRECTORIES
The first thing you will want to do before you begin uploading documents, is to create folders labeled by case numbers.
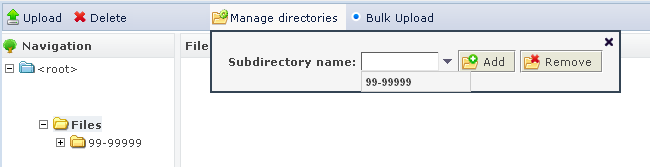
To do this, click on the "Manage directories" button on the menu bar. Once you click on this, a menu item will appear like shown below.
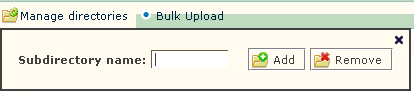
To actually create a case folder, you will have to type the case number in the text box. Below, shows an example case number is in the correct format.
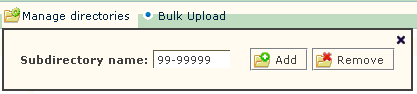
Clicking add will create a folder named "99-99999" in your working directory.
To remove a case folder, just select the parent folder in which the file is located in. For example, in the image below, if you wanted to delete the 99-99999 case folder, you would first select the "Files" folder.

Once you have selected the "files" folder, you would click on the "Manage directories" button on the menu bar. Once this menu appears, you click on the little arrow, left to the "Add" button and select the "99-99999" folder. Once this folder is selected, you click "Remove" and the case folder "99-99999" will be deleted.
BULK FILE UPLOADING
This is most important tool in Trustee|Docs. Using Bulk Uploading, you can upload multiple .pdf's in a single transfer. To begin, select the folder you wish to upload files into.
Once you have the folder selected, click on the "Bulk Upload" button. The image below shows the bulk upload item.
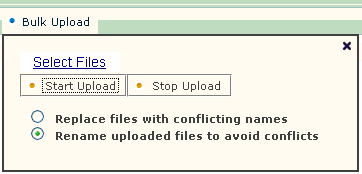
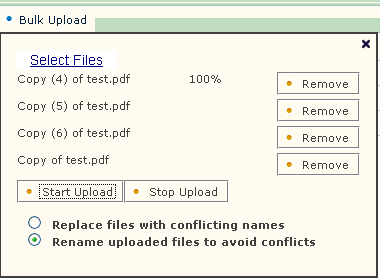
To select the files you wish to upload, click on the "Select Files" link. This link will show you your computers directories. Select the .pdf's you wish to upload by holding "Crtl" on your keyboard and selecting the .pdf's. Once you have the files selected, click on the "Open" button in windows. This will take you back to the Trustee|Docs Site and you should see all of the files you selected in the "Bulk Upload" item's menu. The image below is an example of how that process works.

To transfer the files to Trustee|Docs for processing and packaging, click the "Start Upload" option.
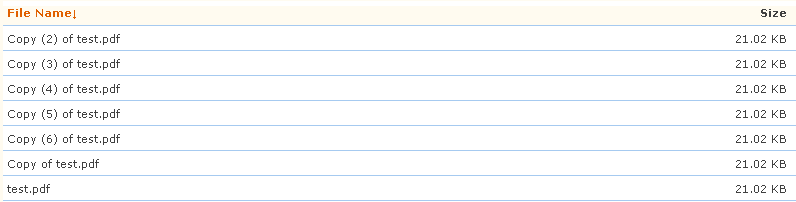
Once this button is clicked, you can watch, as the files are dynamically uploaded and see the transfer progress through the Bulk Upload menu. Once the transfer is complete, you will see the files appear in the directory like in the image below.
DOWNLOADING / ZIP FILE DOWNLOADING
With Trustee|Docs, you can now download your upload receipts to take with you. To do this, follow the steps below:
First, click on the case number you want to download UCR's:

After you click on the case number and it highlights blue, you should see all the upload confirmation receipts (UCR) in that case number folder.

To download these UCR's to your machine, all you have to do is simply select all the files by clicking on one and hold the "Ctrl" key while you click on each file. After you click on the files, they should highlight blue like below, showing that you want to download the files:

After you have selected the files, simply click the "Download" button in the tool bar:

After clicking on the download button, Trustee|Docs will automatically determine how it is to be downloaded. If you attempt to download more then one file at a time, Trustee|Docs will automatically compact the files into a "zip" folder to help speed up the downloads and bundle UCR's together. Below shows what the download looks like for a zip folder:

To view the contents,click the "Save As" option and save the folder to your computer. Then navigate your computer to where you saved the document, right click and unzip the contents to your computer.